Device check-in for Windows device
Windows
You must log in to Windows 10 as Admin User when checking in.
Check-in with provisioning package
Note: If you have already installed the Provisioning Package, remove it before proceeding.
|
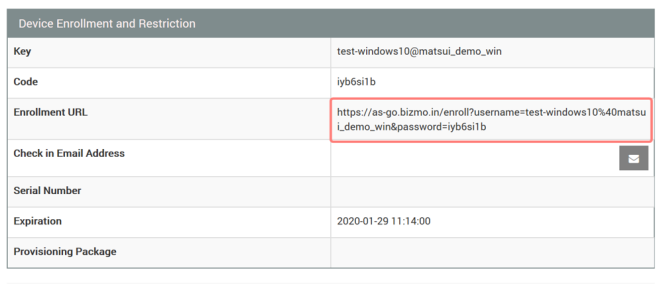
1. Download provisiong package.
|
|
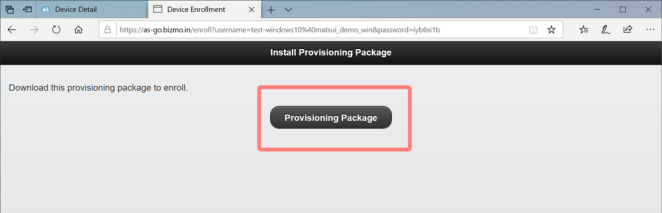
2. On the Install Provisioning Package screen, click Provisioning Package to download the .ppkg file. |
|
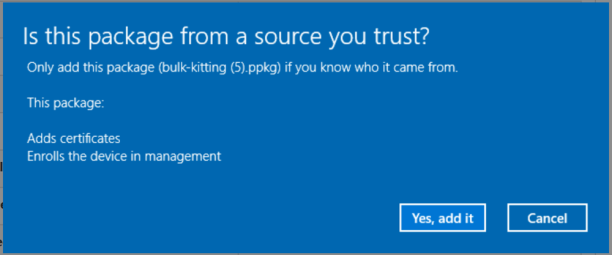
3. Run the .ppkg file and click "Yes, add it". |
|
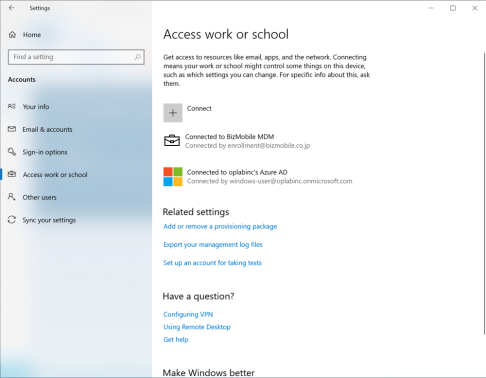
| 4. Open Access Work or School from the system configuration and check in is complete if MDM connection is established. |
Bulk Check-in with provisiong package
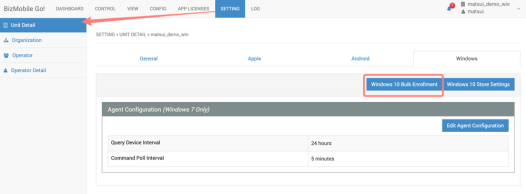
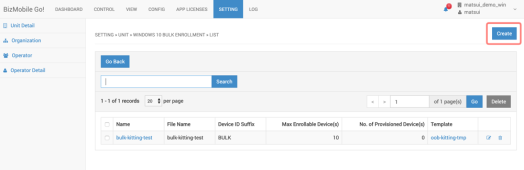
| 1. Go to SETTING -> Unit Detail -> Windows and click Windows 10 Bulk Enrollment button. |
|
||||||||||||
| 2. Click Create button. |
|
||||||||||||
|
3. Enter necessary information and save
|
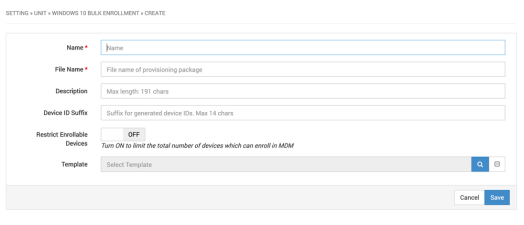
|
||||||||||||
| 4. Click the name of the record you just created. |

|
||||||||||||
| 5. Click Download Provisioning Package button in the detail screen. |
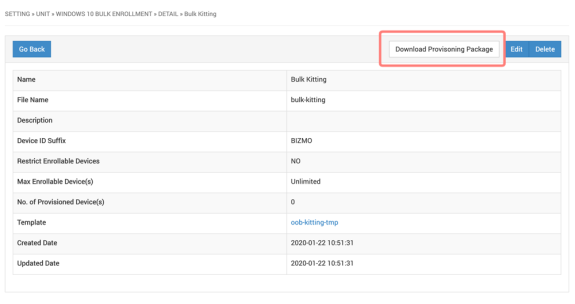
|
||||||||||||
6. Distribute the downloaded .ppkg to device |
|||||||||||||
7. Run the .ppkg file and click Yes, add it . |

|
||||||||||||
| 8. Open Access Work or School from the system configuration and check in is complete if MDM connection is established. |
|
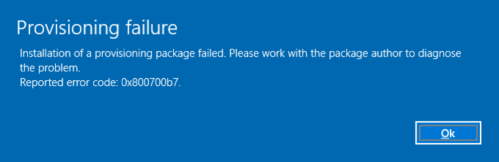
If you get an error when you run the .ppkg file
1. If you get "Provisioning Failure" error, a different .ppkg file may already exist on the device. |
|
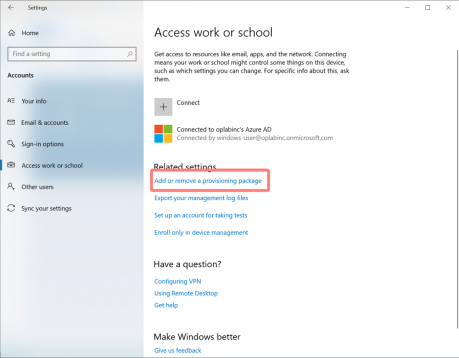
| 2. Go to Setting > Account > Access Work or School and click Add or remove a provisioning package |
|
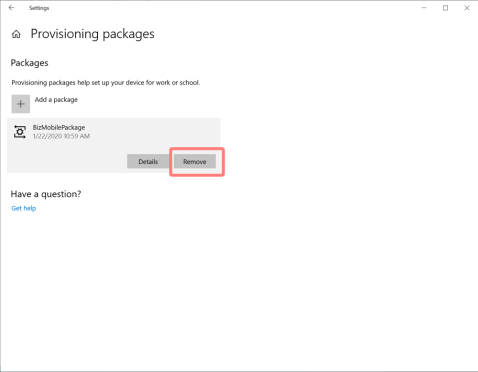
3. Delete the existing .ppkg listed. Then run the .ppkg file again for check-in. |
|